Drivers are updated, Game Mode is on, your power plan is set to High Performance, and you’re still not where you want to be. That’s the point where these tweaks come in. Not the “clear your temp files” stuff you’ve seen a hundred times. Real changes to how your CPU, GPU, RAM, and Windows scheduler interact during a game session. Some of these are guaranteed wins. Others are more situational. I’ll be upfront about which is which.
The table below shows realistic performance expectations for every tweak covered here. XMP and ReBAR are the only guaranteed gains. Everything else depends on your specific hardware and workload.
| Tweak | Impact |
|---|---|
| Enable XMP / DOCP | Guaranteed: 3-15% FPS |
| Enable ReBAR | Guaranteed: 2-8% FPS |
| Disable VBS / Memory Integrity | Consistent: 2-5% FPS |
| Enable HAGS | Consistent: 2-5% FPS |
| Disable HPET | Variable: 0-10% FPS |
| Registry priority tweaks | Minor: frame consistency |
| Disable C-States | Experimental: 0-3% |
Open-world and CPU-bound games show the most improvement from XMP and ReBAR.
BIOS Setting
Enable XMP / DOCP: the one you absolutely have to do
This is the most impactful single setting in the entire guide, and it takes thirty seconds. Most DDR4 and DDR5 kits ship running at their default JEDEC speed, often DDR4-2133 or DDR5-4800, even if you paid for DDR4-3600 or DDR5-6000. XMP on Intel platforms and DOCP on AMD platforms are profiles stored directly on the RAM stick. They tell your motherboard how fast to actually run the memory. Until you enable one of those profiles, you’ve been running slower RAM than you paid for.
I’ve seen this come up constantly when people wonder why their build underperforms. They bought 3600 MHz DDR4 and never enabled XMP. The board ran it at 2133 the whole time. It’s one setting and it’s free.
How to enable XMP or DOCP
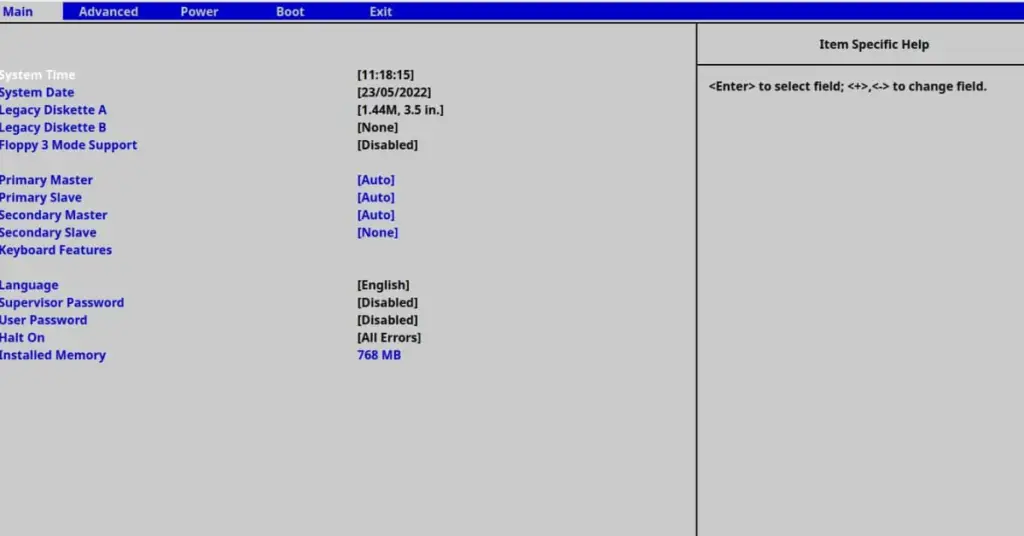
Enter BIOS
Press Delete, F2, or F10 as your PC boots. The correct key appears briefly on screen during POST. Most boards use Delete or F2.
Find the memory or overclocking menu
Look for “AI Tweaker” on ASUS, “OC Tweaker” on ASRock, “Tweaker” on Gigabyte, or “OC” on MSI. The XMP or DOCP option is usually near the top of that section.
Select XMP Profile 1 (or DOCP on AMD boards)
Change from Auto or Disabled to XMP Profile 1. If Profile 2 is available that’s a more aggressive timing set — stick with Profile 1 for stability.
Save and confirm
Press F10 to save and reboot. After the reboot, open Task Manager, go to Performance then Memory, and verify your speed matches the kit’s rated speed (for example, 3600 MHz).
BIOS Setting
Enable Resizable BAR (ReBAR / Smart Access Memory)
Resizable BAR removes a hardware bottleneck between your CPU and GPU. Without it, your CPU can only access 256 MB of your GPU’s VRAM at a time, a limitation carried over from 32-bit PCIe addressing. With ReBAR enabled, the CPU can access the full VRAM pool at once. The result is smoother texture streaming, better 1% lows, and a few percent uplift in average FPS in texture-heavy titles.
How to enable ReBAR
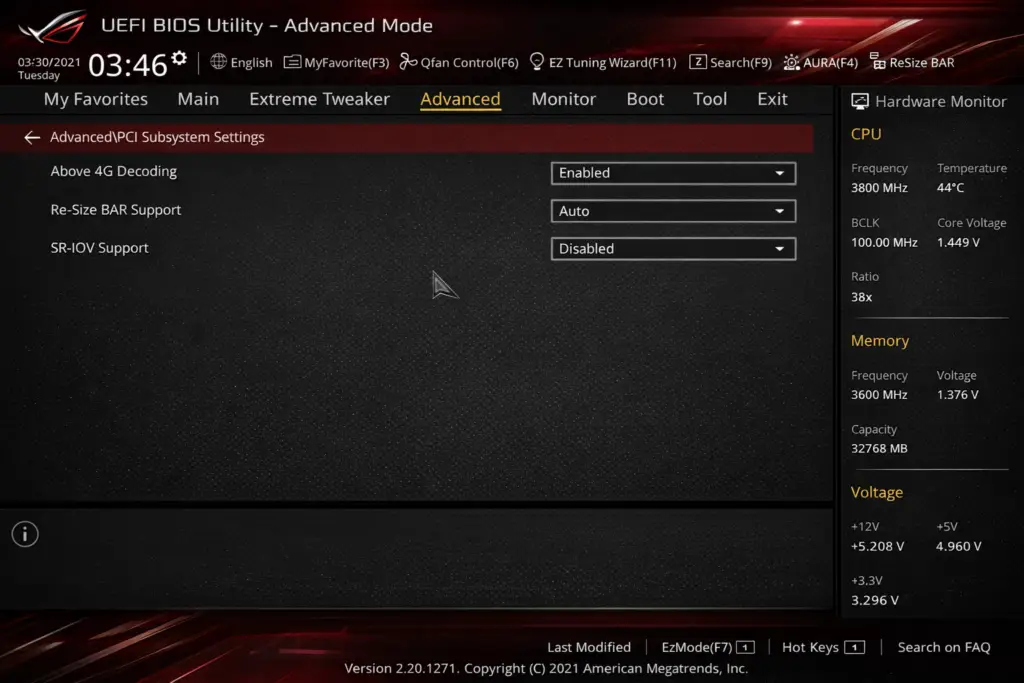
Enable Above 4G Decoding first
Find it under PCIe or Advanced Chipset settings in BIOS and enable it. Without this, Resizable BAR either won’t appear or won’t work correctly.
Enable Resizable BAR Support
Usually located right below Above 4G Decoding. Set it to Enabled or Auto. On ASUS boards it may be labelled “ReBar Support”.
Confirm in GPU-Z after rebooting
Download GPU-Z, open it, and check the Advanced tab for “Resizable BAR: Enabled”. If it shows as Disabled, your GPU or its current driver may not support it.
Windows Security
Disable VBS and Memory Integrity
Windows 11 ships with Virtualization-Based Security and Memory Integrity enabled by default on clean installs and on most machines that upgraded from Windows 10. These security features run a hypervisor layer that isolates parts of the operating system. Genuinely useful for corporate environments. Not useful for a gaming PC where that overhead costs you frames every single session.
From my experience testing this on mid-range rigs, disabling VBS consistently recovers frame time variance even when the raw FPS delta looks small. It’s one of the most underrated optimizations on Windows 11 because most people don’t realize it shipped enabled.
How to disable VBS and Memory Integrity
Open Core Isolation settings
Go to Start, then Windows Security, then Device Security, then Core Isolation Details.
Turn Memory Integrity off
Set Memory Integrity to Off. Windows will prompt you to reboot to apply the change.
Disable Hyper-V and Virtual Machine Platform
Go to Start, search “Turn Windows features on or off”, and uncheck Hyper-V and Virtual Machine Platform if you don’t use VMs or Android emulators. Reboot after this step.
Display Settings
Enable Hardware-Accelerated GPU Scheduling (HAGS)
HAGS lets the GPU manage its own memory and work queue rather than routing everything through the CPU as an intermediary. On paper this reduces input latency and smooths frame delivery. In practice, most players on RTX 3000 series or RX 6000 series hardware and newer report either a small improvement or no change at all. Almost nobody reports a regression. It’s a no-cost setting worth having on.
Go to Settings, then System, then Display, then Graphics, then Change default graphics settings, and toggle Hardware-Accelerated GPU Scheduling on. Reboot. No BIOS access or registry editing needed. Takes about a minute total.
BIOS + Device Manager
Disable HPET: worth testing, results vary
HPET (High Precision Event Timer) is a hardware timer Windows can use for task scheduling. Some systems run better without it, others don’t notice any difference. On older hardware or in specific games, disabling HPET has produced noticeable FPS gains based on testing documented in the Blur Busters forum. On modern systems the typical result is somewhere in the 0-5% range. It’s easy to test and just as easy to reverse, so it’s worth five minutes to find out where your setup lands.
How to disable HPET
Disable in BIOS if available
Look for “HPET Support” or “High Precision Event Timer” in Advanced or Chipset settings. Disable it if you see it. Not all boards expose this option.
Delete the platform clock value
Open Command Prompt as administrator and run:
bcdedit /deletevalue useplatformclockIf you get an error saying the value doesn’t exist, that’s fine. It just wasn’t set to begin with.
Disable the HPET device
Open Device Manager, expand System Devices, right-click High Precision Event Timer, and select Disable device. Reboot and test your framerate in your most-played game.
Restore HPET if needed
Re-enable in Device Manager and run the command below to restore. Or simply leave the default state and Windows picks whichever timer it prefers.
bcdedit /set useplatformclock trueRegistry Editor
Registry tweaks: network throttling and CPU priority
Windows reserves a portion of CPU time for background processes through the MMCSS (Multimedia Class Scheduler Service). By default, games get up to 80% of available CPU time while Windows holds back 20% for background tasks. There are also network throttling settings left over from legacy multimedia streaming that limit how fast packets get processed. Both are adjustable in the registry.
Open Registry Editor by pressing Win + R and typing regedit. Navigate to this path:
HKEY_LOCAL_MACHINE\SOFTWARE\Microsoft\Windows NT\CurrentVersion\Multimedia\SystemProfile| Value | Type | Default | Set to | Effect |
|---|---|---|---|---|
NetworkThrottlingIndex | DWORD | 0xA (10) | 0xFFFFFFFF | Disables network packet throttling |
SystemResponsiveness | DWORD | 20 | 0 | Lets games use 100% CPU when needed |
If either value doesn’t already exist, right-click the right panel of the regedit window, select New, then DWORD (32-bit) Value, and create it manually. Reboot after editing both values.
Registry Editor
Raise GPU and scheduling priority for games
Windows treats game processes with a “Medium” scheduling category by default. Bumping that to “High” tells the OS to give games preferential access to GPU time and I/O bandwidth. Navigate in regedit to:
HKEY_LOCAL_MACHINE\SOFTWARE\Microsoft\Windows NT\CurrentVersion\Multimedia\SystemProfile\Tasks\Games| Value | Type | Default | Set to |
|---|---|---|---|
GPU Priority | DWORD | 2 | 8 |
Priority | DWORD | 2 | 6 |
Scheduling Category | REG_SZ | Medium | High |
SFIO Priority | REG_SZ | Normal | High |
Honestly, the registry priority tweaks are the most debated part of this whole guide. On modern Windows 11 with up-to-date drivers, the scheduler is smart enough that these values have less impact than they did a decade ago. They don’t hurt anything, and on some setups they visibly reduce frame time variance. Don’t expect raw FPS gains from these. Think of them as removing possible sources of inconsistency rather than adding performance headroom.
Experimental BIOS Tweak
Disable C-States: test before you commit
CPU C-States are power-saving idle modes that downscale the processor when it’s not under load, then ramp back up when a workload arrives. The logic behind disabling them is that the CPU never drops to a lower power state, so there’s no ramp-up delay when the game suddenly needs it. In practice, modern boost algorithms actually depend on C-States to function correctly, and some users see worse stuttering with them disabled than with them on.
To try it: go into BIOS, navigate to CPU or Power Management settings, and look for “CPU C-States”, “C-State Control”, or “Enhanced C1E”. Set to Disabled. Run a few full sessions in your most-played game before committing to this. If you notice higher idle temperatures or inconsistent framerate, re-enable them.
Quick Wins
Visual effects and background capture
These won’t move the needle on average FPS in a meaningful way, but they do make a real difference to system responsiveness, especially when alt-tabbing or running the game alongside Discord and a browser in the background.
To cut visual effects: go to Start, search “Adjust the appearance and performance of Windows”, and select “Adjust for best performance”. You can also manually uncheck animations, shadows, and transparency effects individually. On borderline hardware this frees up enough CPU and GPU headroom to reduce micro-stutters during scene transitions and combat.
To turn off background recording: go to Settings, then Gaming, then Captures, and set “Record what happened” to Off. Background DVR runs at all times and constantly eats into RAM and disk I/O bandwidth. I’ve noticed this helps maintain consistent framerate during long sessions on systems sitting close to their VRAM limit. It’s a free improvement with zero downside if you’re not actively using the capture feature.
Summary
Complete optimization checklist
| Tweak | Where | Impact | Risk |
|---|---|---|---|
| Enable XMP / DOCP | BIOS | High | None |
| Enable ReBAR | BIOS | Medium-High | None |
| Disable VBS / Memory Integrity | Windows Security | Medium | Minor security trade-off |
| Enable HAGS | Display Settings | Low-Medium | None |
| Disable HPET | BIOS + CMD + Device Manager | Variable | Easy to reverse |
| Network + CPU registry | Registry Editor | Low | Low (back up first) |
| Games priority registry | Registry Editor | Low | Low (back up first) |
| Disable C-States | BIOS | Experimental | Test carefully |
| Disable visual effects | Performance Options | Low | None |
| Disable background recording | Gaming Settings | Low | None |
Frequently asked questions
How do I optimize my PC with Windows 11 for gaming?
Start with the guaranteed wins: enable XMP in BIOS so your RAM runs at its rated speed, enable ReBAR if your hardware supports it, and disable Memory Integrity in Windows Security. These three changes alone cover most of the real performance gains available. Everything else in this guide is incremental on top of those.
Will these tweaks work on Windows 10?
Most of them yes. XMP, ReBAR, HPET, and the registry tweaks work identically on Windows 10. VBS and Memory Integrity exist on Windows 10 but are off by default on most installs, Windows 11 was the first version to enable them by default, which is why they matter more here.
Is it safe to edit the Windows registry?
The specific values covered in this guide are safe as long as you navigate to the correct path and only edit the values listed. The risk is typing the wrong path or value and corrupting an unrelated setting. Export the registry key before editing, right-click the folder in regedit and select Export. This gives you a one-click restore if something goes wrong.
Should I disable C-States on my Ryzen CPU?
Probably not without testing first. On Ryzen 5000 and 7000, C-States are tightly integrated with AMD’s boost algorithm. Disabling them can cause the CPU to run hotter at idle and, counterintuitively, introduce micro-stutters in some games. Test it, run a session in your most-played game, and compare. If you don’t see a clear improvement, re-enable them.
Do these tweaks help more on lower-end or higher-end hardware?
XMP and ReBAR help more on mid-range builds where the CPU is often the bottleneck feeding the GPU. On a high-end system (RTX 4080, Ryzen 7950X) the gains are proportionally smaller because the hardware is rarely bottlenecked by the factors these tweaks address. Registry and scheduling tweaks matter more on lower-end hardware where the scheduler has to make harder trade-off decisions.
The biggest gains in this guide come from the first two BIOS settings, XMP and ReBAR. Everything after that is diminishing returns. Do those two, verify they’re working, benchmark before and after, then decide if the rest is worth your time. Most players I know are surprised by how much headroom they were leaving untapped just by running RAM at default speeds.