Summary
Fresh Windows 11 install and your PC already feels sluggish before you’ve opened a single game. That’s not your imagination. Windows 11 ships with Candy Crush, TikTok, a weather widget, telemetry services running in the background, and a handful of processes you never asked for and will never use. To debloat Windows 11 means stripping all of that out so your CPU and RAM are working for your game, not wasted on background noise Microsoft decided to preinstall.
I’ve noticed a genuine difference after a proper windows 11 debloat on gaming machines, particularly on systems with 8GB or 16GB of RAM where every freed megabyte counts. The improvements aren’t always dramatic on a high-end build, but the stutters that come from Windows doing random background tasks mid-match get noticeably rarer. Boot times drop. Idle RAM usage shrinks. And the whole system just feels cleaner to use. The key is doing it safely, which means knowing what to remove, what to leave alone, and how to recover if something goes wrong.
Step 1: Remove Bloatware Apps the Safe Way
The first place to start when you debloat windows 11 is the app list. Open Settings, go to Apps, then Installed Apps. Scroll through what’s there and uninstall anything you know you don’t need. Games like Solitaire, Asphalt 9, Candy Crush, and similar titles are safe to remove immediately. So are trial antivirus offers, apps that are essentially just shortcuts to websites like Facebook or Instagram, and any manufacturer utilities that came bundled with a prebuilt.
You can also right-click most app icons directly in the Start menu and hit Uninstall, which is faster when you know exactly what you’re targeting. This method uses Windows’ built-in uninstaller, so it’s reversible. If you change your mind about anything removed this way, you can reinstall it from the Microsoft Store.
What you should not touch: anything you don’t immediately recognize. If you’re unsure about an app, search its name before removing it. Leave .NET frameworks, Visual C++ redistributables, and anything with “driver” or “runtime” in the name completely alone. Removing the wrong thing here can break other software or cause hardware to stop working correctly.
Settings > Apps > Installed Apps. Click the three-dot menu next to any app and choose Uninstall. Best for: games, trial software, social media shortcuts, manufacturer utilities. All removals through this method can be undone via the Microsoft Store.
Settings > Apps > Startup. Toggle off anything that doesn’t need to run at boot. Spotify, Discord, Steam, OneDrive, and similar apps all add load time and eat RAM at startup. This doesn’t uninstall anything, it just stops them auto-launching. You can re-enable any of them instantly if needed.
Settings > Privacy & Security > Diagnostics & Feedback. Set “Send optional diagnostic data” to Off. Also go to Settings > Privacy & Security > Activity History and disable it. These settings stop Windows from running background data collection processes that occasionally spike CPU usage at the worst possible moment.
Settings > Personalization > Taskbar. Turn off Widgets and Search highlights. You can also disable Copilot from the same menu if it appears. The Widgets service runs a background process that fetches news and weather even when the panel is closed. Turning it off kills that background load entirely without touching anything system-critical.
The Win11Debloat script by Raphire on GitHub is the most widely recommended automated option in the community. Run PowerShell as administrator and paste: & ([scriptblock]::Create((irm "https://debloat.raphi.re/"))). Choose Default mode for a conservative removal set. Only use this if you’ve already done the manual steps above and want to go further. Review what it’s removing before confirming. This isn’t a one-click fix, it’s a tool for people willing to understand what they’re changing.
What to Keep and What to Remove: A Clear Reference
The trickiest part of any windows 11 debloater process is knowing where to draw the line. Removing too little leaves background noise on your system. Removing too much breaks things. From my experience the biggest mistake people make is running an aggressive automated script without reading what it does, then wondering why their system behaves oddly afterward.
| App / Feature | Safe to Remove? | Impact if Removed | Method |
|---|---|---|---|
| Candy Crush, Solitaire, casual games | Yes | Frees background update processes | Settings > Apps |
| Clipchamp, News, Weather, Maps | Yes | Kills background refresh tasks | Settings > Apps |
| OneDrive (if not used) | Yes | Removes auto-sync startup load | Settings > Apps |
| Xbox Game Bar | Conditional | Loses overlay; some games need it for captures | Settings > Gaming |
| Widgets service | Yes | Removes background news fetch process | Taskbar settings |
| Telemetry / Diagnostics | Yes | Reduces background CPU spikes | Privacy settings |
| Windows Security / Defender | No | Removes your antivirus protection entirely | Leave alone |
| .NET Framework / C++ Runtimes | No | Breaks games and applications immediately | Leave alone |
| Windows Update | No | Prevents security patches and driver updates | Leave alone |
Using a Windows 11 Debloater Tool Safely
Automated tools make the debloat windows 11 process faster, but they also make it easier to remove things you didn’t mean to. Most players I know who’ve had bad experiences with debloating ran a script they found on a forum without reading it first. The script removed something that looked optional but wasn’t, and they ended up reinstalling Windows.
The two tools worth knowing about are Win11Debloat by Raphire (linked in step 5 above) and O&O ShutUp10++, which is more focused on privacy and telemetry settings than app removal. Both are widely used and reasonably well-maintained. The difference is that Win11Debloat runs through PowerShell and removes apps, while O&O ShutUp10++ gives you a checkbox interface for toggling Windows settings. I usually recommend O&O ShutUp10++ to people who want privacy gains without touching the app list, and Win11Debloat for people comfortable with PowerShell who want a more complete cleanup.
Whatever tool you use, run it on Default or Recommended settings first, not the most aggressive mode available. The goal isn’t to strip Windows down to nothing. The goal is a cleaner, quieter system that stops wasting resources on things you don’t use. You can always go further later if you want more, but you can’t easily undo an aggressive automated removal without that restore point you created at the start.
What Not to Touch When You Debloat Windows 11
This section exists because it’s where things go wrong. The debloat windows 11 community online sometimes pushes recommendations that go further than most gamers should actually go. Disabling Windows Defender, removing the Microsoft Store entirely, or stripping out Windows Update are all things certain guides suggest, and all of them create real problems in practice.
Disabling Defender without a replacement antivirus leaves your system genuinely unprotected. Removing the Microsoft Store breaks the update path for apps that depend on it, including some Xbox services that games use for multiplayer. Disabling Windows Update means your GPU drivers stop receiving automatic updates through Windows, which can cause performance regressions in new game releases that expect updated driver features.
The principle I follow is: only remove or disable things where the benefit is clear and the risk is low. Everything in the table above marked green fits that description. Everything marked red doesn’t, regardless of what you read somewhere online. A gaming PC that’s slightly over-provisioned with background services is better than one that’s broken or vulnerable because someone followed overly aggressive advice.
After a safe windows 11 debloat, your system will run noticeably cleaner without putting anything important at risk. Idle RAM usage drops, startup time improves, and those mid-game CPU spikes from background Windows tasks become much rarer. That’s genuinely worth the hour it takes to do this properly. Just keep that restore point handy until you’ve confirmed everything is running as expected.
Frequently asked questions
Does debloating Windows 11 actually improve gaming performance?
Yes, though the improvement is most noticeable on systems with 8GB of RAM or less. A safe debloat typically frees 600 to 800MB of idle RAM by removing background app processes, kills several startup tasks that add boot time, and reduces the CPU spikes that come from telemetry and update services running in the background during gameplay. On higher-end systems with 32GB of RAM the gains are less dramatic, but stutter reduction from fewer background tasks is still real and worth doing.
What is a Windows 11 debloater and is it safe to use?
A windows 11 debloater is a script or tool that automates the removal of preinstalled apps and disabling of Windows background services. Safety depends entirely on which tool you use and which settings you apply. Win11Debloat by Raphire on GitHub and O&O ShutUp10++ are both well-maintained and widely used with good track records. Random scripts from forums or Reddit threads without clear documentation are not safe to run blindly. Always create a restore point before using any automated tool, and always use Default or Recommended settings on your first run rather than the most aggressive option available.
Can I reverse the changes if something breaks after debloating?
Yes, if you created a restore point before starting. Open the Start menu, search “System Restore,” and follow the prompts to roll back to the restore point you created. Apps removed through Settings can also be reinstalled individually from the Microsoft Store. Changes made through O&O ShutUp10++ can be reversed within the tool itself using the undo function. Changes made through PowerShell scripts are harder to reverse individually, which is another reason to use Default mode rather than aggressive settings on a first run.
Should I disable Xbox Game Bar when I debloat Windows 11?
It depends on whether you use it. Xbox Game Bar is the overlay you access with Windows key + G for recording clips, monitoring performance, and using the FPS counter. If you never use it, disabling it removes a background process and frees a small amount of RAM. If you record gameplay or use its performance overlay, keep it enabled. You can disable it from Settings > Gaming > Xbox Game Bar. Note that some games have anti-cheat systems that interact with Game Bar, so if you play competitive titles check whether your game has any dependency on it before disabling.
Will debloating Windows 11 improve FPS in games?
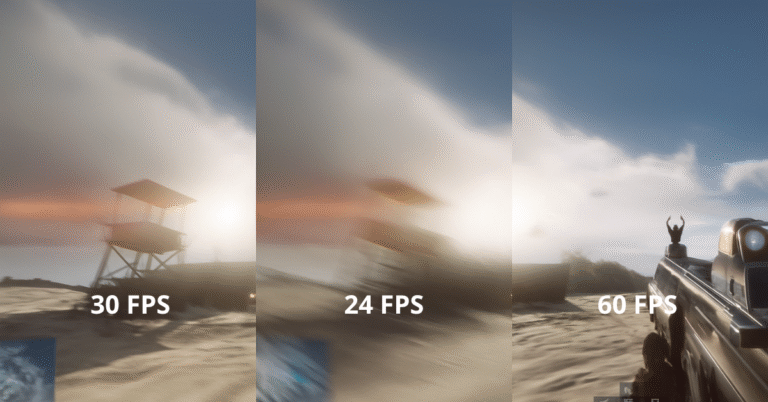
Not directly in most cases, because FPS is primarily limited by your GPU and CPU capabilities rather than background services. What debloating improves is consistency. Fewer background processes means fewer random interruptions that cause frame time spikes, which shows up as stutter rather than a lower average FPS. On systems with limited RAM where Windows background processes are competing with the game for memory, freeing that overhead can improve minimum frame rates in memory-intensive titles. If your average FPS is low, the solution is a hardware upgrade. If your gameplay feels choppy despite decent average FPS, debloating and optimization is worth trying first.
Is it safe to disable Windows Defender when debloating?
No. Disabling Windows Defender without a replacement antivirus leaves your system unprotected, which creates real security risk. Several aggressive debloat guides recommend disabling it to free resources, but the performance gain is minimal and the security trade-off is not worth it for most users. If you want to reduce Defender’s impact on gaming performance, a better approach is to add your games folder to the Defender exclusions list in Windows Security settings, which prevents it from scanning game files during play while keeping real-time protection active everywhere else.